Category Archives: Fruit

Blackberry Chutney

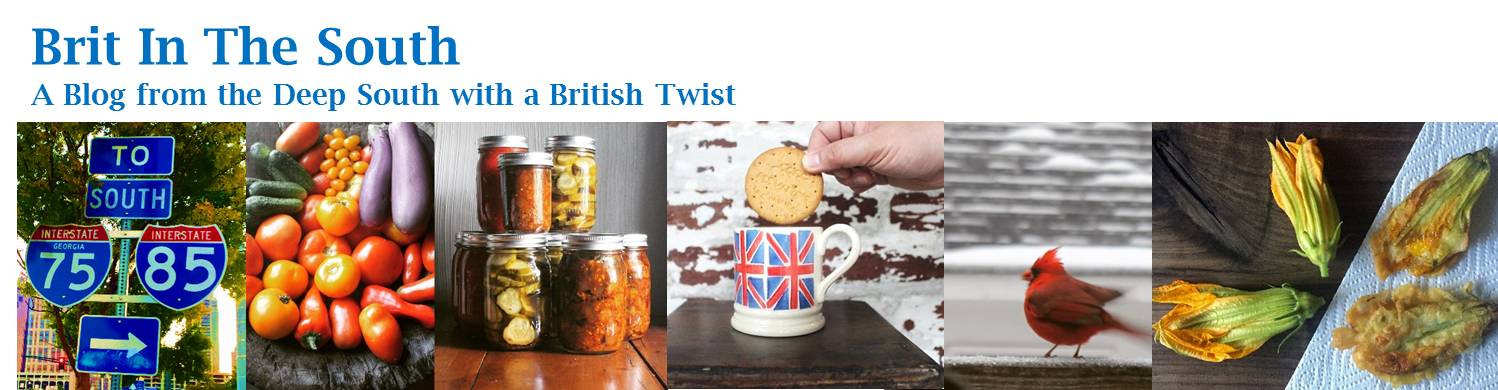
When we venture out to our favourite pick-your-own farm we often go crazy and pick a bucket or two more than we intended. They never go to waste; we always find some way to preserve them.

Blackberry Chutney from britinthesouth.comA number of years ago we had a mountain of blackberries on our hands. We had already made jam, shrub and liqueur, as well as selling a bucket to a local chef.

Blackberry Chutney from britinthesouth.comFor the remaining berries I looked to Marisa McClellan’s “Food In Jars” for inspiration and it was a strawberry chutney recipe that caught my eye. I followed it pretty closely apart from swapping out strawberries for blackberries and was very pleased with the results. We now make a big batch every year, inevitably giving some of it away to friends that rave about it. Over the years I have reduced the amount of star anise used from the original recipe, and find I need a longer cooking time to get the consistency I like but have otherwise been pretty faithful to it.

It seemed the perfect candidate for this month’s Food in Jars Mastery Challenge from Marisa for which the topic is hot pack preserving.

It is a delicious sweet and sour blend of fruit, vinegar and spices that goes well with cold meats but is particularly good with cheeses like mature cheddar or a strong blue.

Blackberry Chutney

4 pounds blackberries

1 large red onion, finely chopped

2 cups light brown sugar

2 cups apple cider vinegar

1.5 cups golden raisins

1 lemon, seeded and chopped

3 tablespoons yellow mustard seeds

1 tbs salt

2 tsp red pepper flakes

1-2 small pieces of star anise (broken from a whole star anise)


Place the blackberries in a large pot and lightly crush (I use a potato masher).

Blackberry Chutney from britinthesouth.comAdd all the other ingredients to the pot. Stir to mix and then bring to a boil over medium high heat.

Reduce the heat to medium and cook until most of the juice has evaporated and the mixture has reduced to a thick and syrupy consistency. This can take 90-120 minutes. Stir regularly and keep an eye on it as it can easily stick to the pan if you neglect it and/or have the heat too high.

Blackberry Chutney from britinthesouth.comOnce it has achieved your desired thickness remove it from the heat.

Pour the chutney into sterilised jars, leaving 1/2 inch of headspace and then process in a boiling water bath canner for 20 minutes. If you need to know more about water bath canning there is a good introductory guide on the Ball canning website.

Yield: 4 pint jars

Cream Tea Truffles with Scones, Strawberries and Clotted Cream

Summer has definitely arrived. Here in the South the days are long and both the temperature and the humidity levels are firmly in the 90s.

Cream Tea Truffles with Scones, Strawberries and Clotted Cream from britinthesouth.comAcross the pond the last couple of weeks have seen the tennis at Wimbledon when my thoughts automatically  turn to the vast amount of strawberries and cream that would have been consumed during the two weeks of the Championships, washed down with copious amounts of champagne and Pimm’s.

Strawberry season is long gone in the South but I can still temporarily transport myself back to the English summertime with a traditional cream tea of scones with strawberry jam and clotted cream.

Like many English food traditions the exact origins of the cream tea are lost in time and the south western counties of Devon and Cornwall both argue that their versions are true and original. They even disagree on whether the jam or the cream should go on the scone first (cream first in Devon, jam first in Cornwall).

For the uninitiated, clotted cream is another creation of south west England, a delicious spreadable cream, rich in fat, made by gently heating full fat cow’s milk and then skimming off the thick creamy crust that forms on top as it cools. It is commercially available in the UK but can be hard to find in the USA. Luckily you can make at home with a little patience.

Scones, strawberry jam, clotted cream. A wonderful trinity of delicious ingredients and when thinking about cream teas I couldn’t resist the thought of transforming them into a bite sized treat. The English summer in a single truffle.

First you need to assemble your ingredients. For scones, my go-to recipe is this one from River Cottage. River Cottage is also the recipe source for the jam I make every strawberry season, from their excellent book, “The River Cottage Preserves Handbook”.

Cream Tea Truffles with Scones, Strawberries and Clotted Cream from britinthesouth.comYou can make your own clotted cream by gently heating cream and scraping off the thick crust that forms on top as it cools. The key is gently heating it without boiling it, so it can be done in a low oven, a slow cooker or on a stove top in a double boiler. I went the double boiler route, using this recipe for guidance.

It is then simply a case of combining the scones, strawberries and clotted cream with chocolate to give you a delicious taste of summer.

Cream Tea Truffles with Scones, Strawberries and Clotted Cream

3oz scone

2oz clotted cream

2oz strawberry jam

3oz white chocolate

6oz milk chocolate (to coat)

Crumble the scone into a bowl. Add the strawberry jam and clotted cream and stir to combine.

Cream Tea Truffles with Scones, Strawberries and Clotted Cream from britinthesouth.comGently melt the white chocolate over medium heat in a double boiler or a glass bowl over a pan of water. Once melted add it to the scone / jam / cream mixture and stir together. When cool, place in the refrigerator until the mixture is firm.

Taking a teaspoon full of the mixture at a time, roll into balls to form the centres of the truffles. Place on a baking sheet lined with parchment paper, then return to the fridge to firm up again.

Cream Tea Truffles with Scones, Strawberries and Clotted Cream from britinthesouth.comMelt the milk chocolate for the coating in a double boiler. Dip the truffle centres in the melted chocolate to coat and place on baking parchment to set before enjoying.

Yield: 18 truffles

Sweet Lime Posset

I can happily spend hours browsing in some of the large ethnic grocery stores around Atlanta, with aisle after aisle of obscure Asian, Hispanic, European and Middle Eastern ingredients.

Sweet lime posset from britinthesouth.comI’m often drawn to the citrus selection, which offers fruit never seen in regular supermarkets, such as pomelos, sour oranges and makrut limes.

Sweet lime posset from britinthesouth.com

I recently stumbled upon a mound of what looked like large lemons but were labelled “sweet limes”. I’d never seen these before so jumped online to educate myself. Commonly found in South and Southeast Asia it is a different fruit to regular and key limes, and as the name suggests the flavour is sweeter and more mild. I couldn’t resist grabbing a few to play with.

Sweet lime posset from britinthesouth.com

Although a primarily Asian fruit I decided to give my sweet limes an ancient British treatment and turn them into a posset. Dating back to the middle ages, a posset was originally a spiced hot milky drink, with the milk curdled by the addition of wine or ale. Over the centuries it has evolved into more of a dessert which is set rather than liquid but is still made by curdling cream.

Sweet lime posset from britinthesouth.com

In Asia sweet limes are often simply used in drinks so I was disappointed when I squeezed and tasted some and found the juice rather bland, so I added a little regular lime juice to my posset to ensure a good citrus tang in the final result, which turned out to be a perfect summer dessert: light and creamy with a delicate lime flavour.

Sweet Lime Posset

2 cups heavy cream

5 tbs granulated sugar

3 tbs freshly squeezed sweet lime juice

2 tbs freshly squeezed lime juice

Put the cream in a pan, add the sugar and bring to a boil over medium high heat, stirring to dissolve the sugar.

Boil for 4 minutes ensuring the sugar is dissolved and making sure the cream doesn’t burn or boil over.

Remove the pan from the heat and stir in the lime juice. Allow the mix to steep for 20 minutes.

Stir the mixture again and then spoon into serving dishes. Once it is cool, refrigerate for at least a couple of hours to set before enjoying.


Georgia Peach Bellini Truffles

It’s peach season here in the peach state and I’ve already knocked out a batch of jam from some of this year’s crop.

Although the jam is fantastic generously spread on hot buttered toast I couldn’t resist having a go at a batch of chocolate truffles, trying another twist on my favourite recipe for alcohol infused truffles.

Georgia Peach Bellini Truffles from britinthesouth.comMy inspiration was the classic Italian Bellini cocktail, a mix of prosecco sparkling wine and peach puree. The truffles just need chocolate, peach jam and a little bit of prosecco, so you’ll have some left to sip as you eat the truffles.

It’s a pretty simple recipe and the results are delicious.

Georgia Peach Bellini Truffles from britinthesouth.com

Georgia Peach Bellini Truffles

8oz white chocolate

8oz dark chocolate (I used Ghirardelli 60%)

4oz Peach Jam

4 tsp prosecco

Georgia Peach Bellini Truffles from britinthesouth.comMelt the white chocolate over medium heat in a double boiler (or use a glass bowl over a pan as I do).

Once melted add the jam and prosecco and stir to combine. Allow to cool and then put in the fridge until the mix is firm.

Use a teaspoon to scoop walnut sized balls from the chocolate mix and roll into balls. Put the balls on a baking tray lined with parchment paper and then return to the fridge to firm up again.

Melt the dark chocolate over medium heat in a double boiler and then coat the chocolate balls. Once again place them on a parchment paper lined baking tray for the chocolate to cool and set before enjoying.

Georgia Peach Jam

The topic for the Food in Jars mastery challenge for June is jam. As I live in the Peach State and the first of this year’s Georgia peach crop has just started to show up in local farmer’s markets it seemed the ideal candidate to turn into jam.

Georgia peach jam from britinthesouth.comSadly, the Georgia peach crop for 2017 is estimated to be 80% down due to a warmer than average winter followed by a spring freeze, so I need to take advantage of what I can get my hands on before the supply dries up.

Georgia peach jam from britinthesouth.comMy jam is based on Marisa’s recipe from “Food in Jars“, although I tweaked the amount of cinnamon and nutmeg from the original recipe.

The jam turned out really well and will be a welcome reminder of this year’s crop when the limited supply disappears.

If you have any spare jam, you can use it to make a decadent treat: bellini truffles. Click here for the recipe.

Peach Jam

2 lbs fresh peaches, peeled, pitted and coarsely chopped

2 cups granulated sugar

Zest and juice of a lemon

0.25 tsp cinnamon

0.25 tsp nutmeg

3oz pack of liquid pectin

Put the peaches and sugar in a large non-reactive pan and stir well to combine. The peaches should start releasing their juice. Bring to a boil and add the lemon zest and juice, cinnamon and nutmeg. Cook over high heat for 15-20 minutes.

Georgia peach jam from britinthesouth.comAdd the pectin and and bring to a rolling boil for 5 minutes. The jam should have thickened. Remove from the heat.

Pour the jam into sterilised jars, leaving 1/2 inch of headspace and then process in a boiling water bath canner for 15 minutes. If you need to know more about water bath canning there is a good introductory guide on the Ball canning website.

Yield: Three 8oz jars

Save

Save

Save

Serviceberry Shrub

I wrote last year about my delight in discovering a serviceberry tree on public property in my neighbourhood, which gave me the chance to do a spot of urban foraging and make something delicious from the berries I picked.

serviceberry shrub from britinthesouth.comI’m glad to say that I have subsequently spotted a few more serviceberry trees within walking distance of my home meaning I can grab a decent haul of the sweet red berries but leave plenty on the tree for other foragers and birds.

serviceberry shrub from britinthesouth.comThe window for picking is relatively short. There was about a one week period where I was making daily strolls to pick berries from the abundant supply. I then returned from a couple of days out of town to find that the trees were bare of berries and that was it for this year.

Luckily I had gathered enough to make something delicious. Last year I opted for a sweet, thick syrup, perfect with pancakes. This year I decided to turn my berries into a shrub, or drinking vinegar. I make these regularly, especially when I have a glut of strawberries or blackberries, but have never tried with serviceberries before.

The result is absolutely delicious; it’s a pity that I’m going to have to wait another year until I can make some more.

Serviceberry Shrub

Ingredients

12oz fresh serviceberries

1 cup distilled white vinegar

Granulated sugar

serviceberry shrub from britinthesouth.comPlace the berries in a glass or ceramic jar, crush lightly and add the vinegar.

Leave to steep for 4 days, stirring or shaking daily.

After 4 days strain the fruit. Then add the sugar: I use a 2:1 liquid to sugar ratio but you can adjust to your personal taste. After straining I had around 10 fl.oz. of liquid so I added 5oz of sugar to it and then gently heated it in a pan over medium heat, stirring regularly until the sugar dissolved, about 10 minutes.

Once the shrub is cool, bottle it and store in the fridge.

I usually drink my shrubs diluted with sparkling water.

Red Poblano Pepper Jelly

red poblano pepper jelly from britinthesouth.comI have cooked many times with poblano peppers and until last week all the poblanos I’d ever seen were either a bright and vivid dark green colour or a glossy chocolatey brown.

red poblano pepper jelly from britinthesouth.comSo I was delighted to find some bright red poblanos mixed in with the green at one of my favourite markets and couldn’t resist grabbing a bagful of them. A quick google search led me to rickbayless.com where the Mexican cooking guru enthuses about the red poblano.

Poblanos take a long time to ripen to red so most are plucked from the vine whilst still green, hence their limited availability. I tried his recipe for “fettucine with butternut squash and red poblano crema” and can heartily recommend it.

red poblano pepper jelly from britinthesouth.comThe rest of my pepper haul was destined to make a batch of red poblano pepper jelly, jelly being one of the options for March’s Food in Jars Mastery Challenge. Pepper jelly is one of my preserving staples in the summer when peppers of all shades are abundant in our CSA box, but making it with red poblanos would be a first for me. They are slightly hotter than their green counterparts , with a sweeter, more fruity flavour and, as I discovered, make a fantastic jelly.

I’ve already served it in the classic pairing of goats cheese and pepper jelly but it would also make a great glaze for meat or vegetables, be the perfect condiment for a grilled cheese sandwich, or add a kick when whisked into a salad dressing.

red poblano pepper jelly from britinthesouth.comThe recipe is based on one for “Sparkling Sweet Pepper Jelly” from “The Complete Book of Small Batch Preserving”. As the name suggests, this recipe leaves you with small jewel like pieces of pepper suspended in a bright, glowing jelly, making it visually appealing for the table as well as delicious. It also means that you have quite a bit of chopping to do to get the tiny pepper pieces but the result is worth it and once that bit of prep is done it is a pretty simple recipe.

red poblano pepper jelly from britinthesouth.com

Red Poblano Pepper Jelly

1.5 cups finely chopped red poblano peppers

0.75 cup white wine vinegar

3 cups granulated sugar

1 pouch liquid fruit pectin (I used a 3oz pouch of Certo liquid fruit pectin)

Combine the chopped peppers, vinegar and sugar in a non reactive saucepan (stainless steel or enamel).

Bring to the boil over high heat and boil hard for a minute, stirring constantly.

Add the liquid fruit pectin, bring to the boil again and boil hard for one minute. Remove the pan from the heat.

Ladle the jelly into sterilised jars, leaving half an inch of headspace.

Process in a boiling water bath canner for 15 minutes.

Yield: 3.5 cups


Save

Save

Save

Save

Save

Save

Save

(Very) Small Batch Cider Making

Throughout the autumn of last year our CSA box was particularly well supplied with apples. As fast as we tried to eat them, dry them, make sauce or preserve them in some other way, before we knew it another week had gone by and we had another pile on our hands.

small batch cider making from britinthesouth.comBy the end of October the surplus had reached the stage where I opted to turn it into cider, or “hard cider” as it is known on this side of the Atlantic. It is not a decision I take lightly as I don’t have a cider press, making it a fairly labour intensive process which doesn’t yield a huge amount of cider, but there is a certain satisfaction to be gained from watching the precious liquid ferment and bubble away and eventually enjoying the fruits of all that work with a chilled glass of the finished product.

small batch cider making from britinthesouth.comThe process I use is basically the one to be found in this video from theperennialplate.com.

First, I wash the apples, before coarsely chopping them, pips and all, and throwing them in a food processor. They are then processed until finely chopped. The resulting chopped apples are then passed through a food mill. This is the most laborious part of the process, but I keep cranking that handle until I get as much pulp out of the apples as I can, leaving behind just a dry apple residue.

small batch cider making from britinthesouth.comDuring this process the apple pulp tends to oxidise, taking on a dark brown colour, but as the cider ferments it always turns a beautiful golden hue, so there is no need to worry.

The final stage is to take the thick pulp from the food mill and leave it to strain through muslin or a jelly bag to yield as much juice as you can. In this case, 17 apples yielded 50 fl.oz of juice.

small batch cider making from britinthesouth.comIn the video on theperennialplate.com they rely on the natural yeasts present on the apples to trigger the fermentation. I prefer to give nature a helping hand, and add champagne yeast to the juice. Yeast sachets from wine making stores are typically enough to ferment 5 gallons so estimate how much to use based on how much juice you have. It is not an exact science so don’t worry about being too precise, and if in doubt, use a little more yeast than you think you need.

small batch cider making from britinthesouth.comPut the juice and yeast in a sanitised glass vessel, seal with an airlock and leave to bubble away for a few weeks until the fermentation activity slows down, the juice clears and a thick layer of sediment forms. In this case it took about 5 weeks. I then syphoned the cider into a fresh fermenting vessel, leaving behind the sediment.

I left this for a couple of weeks until all fermentation had stopped before bottling. My final yield was just enough to fill three 11oz bottles. I added half a teaspoon of granulated sugar to each bottle to ensure a secondary fermentation in the bottle to give the final cider some sparkle.

Leave for at least a couple of weeks for the secondary fermentation to generate some fizz in the bottle. The cider will be good for at least a year. I’ve cracked open dusty bottles from my basement that are 3-4 years old and they are still good.

small batch cider making from britinthesouth.com

Save

Save

Save

Save

Save

Save

Save

Save

Save

Save

Save

Lime, Lemon & Honey Marmalade

If you wander into a typical British supermarket looking for a jar of marmalade, it is unlikely that you will be disappointed. We love the stuff, so your only problem is going to be making a decision from the choices on offer. The majority of jars will be classic Seville orange marmalade, but even then you’ll have the choice between fine cut, thick cut or even peel free. Then you have variations on the orange theme, with added whisky or ginger, before moving on from oranges to the other citrus fruits.

Lime, Lemon & Honey Marmalade from britinthesouth.comI have never met a marmalade I didn’t like but if pressed for a favourite I think I would have to opt for Rose’s lemon and lime marmalade. The sharpness of the fruit really wakes up your tastebuds, especially on a cold winter’s day. It is fairly easy to find on this side of the Atlantic but I’ve always thought about having a go at making my own version and was finally inspired to do so by the Food in Jars Mastery Challenge, an excellent idea from Marisa of the Food in Jars blog: 12 monthly challenges throughout 2017, each one designed to improve a particular canning or preserving skill. January’s challenge is marmalade, so I had no excuse not to give it a try.

Lime, Lemon & Honey Marmalade from britinthesouth.comIn looking for a recipe I was spoilt for choice. My well stocked shelf of preserving books offered many possibilities before I even ventured online. In the end I opted for one of my most used volumes, “The River Cottage Preserves Handbook” by Pam Corbin. As well as writing and appearing on TV, Pam used to own a preserves company and is a judge at the World Marmalade Awards, so is well qualified.

You can find a clip of her making Seville orange marmalade here.

Lime, Lemon & Honey Marmalade from britinthesouth.comI went with her whole fruit recipe but tweaked it a little, replacing some of the sugar with local honey. The whole fruit method is quicker and easier than the sliced fruit technique of marmalade making but can result in a less delicate and slightly more bitter final product. I made a few batches of this recipe, using different proportions of limes to lemons and was delighted with the final marmalade every time although I finally settled on a 50:50 ratio as my favourite. It sets well, and has a wonderful balance of sharpness from the fruit, sweetness from the sugar and honey, and a pleasant, slightly bitter, finish.

Lime, Lemon & Honey Marmalade from britinthesouth.comIt is worth making just to fill your kitchen with that wonderful citrus aroma on a cold January day.

Lemon, Lime and Honey Marmalade

1lb fruit, preferably unwaxed (I went with approximately 50% limes / 50% lemons but you can tweak the ratio to your taste)

4 cups granulated sugar

1/3 cup honey

Scrub the fruit, place in a pan and add 6 cups (48fl.oz) water to cover. Bring to the boil and then reduce the heat and simmer, covered, until the fruit is tender and the skin can be easily pierced with a fork (about an hour).

Remove from the heat and leave until the fruit is cool enough to handle. Make sure you keep the cooking water.

Slice the fruit in half and use a teaspoon to remove the pulp from the peel. Put the pulp in a sieve over a bowl, remove and discard any seeds but retain the pulp and juice.

Then slice the rinds to your desired thickness. I went for a fine shred, which is a little more time consuming but I simply prefer a finer shred in my final marmalade rather than thick chunks.

Put the sliced fruit, retained pulp and juice and 3 cups (24fl.oz) of the retained cooking liquid into a pan, and add the granulated sugar and honey. Bring to a boil over high heat, stirring until the sugar has dissolved.

Bring to a rolling boil and boil rapidly until the setting point is reached. Between my different batches this took anywhere from 25-35 minutes, so it is best to check that you’ve achieved the setting point.  Just to be on the safe side, I used two different tried and tested techniques to make sure. I used a thermometer to check when it had reached 220 degrees F, and then to be certain I did a “crinkle” test, dropping a little bit of marmalade onto a saucer that had been in the freezer for a few minutes. After letting it cool for a minute or so, if it crinkles when you push it with your fingertip, you are good to go.

Remove from the heat and leave for a couple of minutes. Stir gently to disperse any scum that has formed on the surface during the boiling.

Pour the marmalade into sterilised jars, leaving 1/2 inch of headspace and then process in a boiling water bath canner for 15 minutes. If you need to know more about water bath canning there is a good introductory guide on the Ball canning website.

Yield: Five 8oz jars

Lime, Lemon & Honey Marmalade from britinthesouth.com


.


Save

Save

Save

Save

Save

Save

Save

Save

Strawberry Wine: 2016 Vintage

This year’s batch of strawberry wine started life early one morning in mid April when we headed about an hour south of Atlanta to our favourite pick your own farm. There was a slight chill in the air when we started but we soon warmed up as we filled half a dozen buckets with ripe red berries.

Strawberry Wine 2016 Vintage from britinthesouth.comI have been making this strawberry wine recipe for many years. It is a beautifully coloured, fragrant, dry rosé that is delicious when lightly chilled and retains a delicate aroma of strawberries.

Strawberry Wine 2016 Vintage from britinthesouth.comThe recipe comes from my well thumbed copy of “The Complete Book of Home Winemaking” by H.E.Bravery, which dates from 1979 and is a book I have been using for over thirty years, having started my home winemaking career at a rather young age. H.E.Bravery was a prolific author on the topics of home wine and beer making, publishing many books, primarily in the 1960s, such as “Home Brewing Without Failures” and “Home Booze: Complete Guide for the Amateur Wine and Beer Maker”. Some of his writing now seems a little dated, especially as a lot of the science and equipment used in home beer and winemaking has moved on since he wrote his books but many of the fundamentals are still sound.

This recipe uses what Bravery calls “the Campden method” as it uses Campden tablets, small pills of sodium metabisulphite, which are added to the fruit at the start of the process, killing the wild yeasts and bacteria which could otherwise affect the fermentation process and spoil the flavour of the wine.

I normally make this wine in a one gallon batch but as that produces a mere six bottles I decided to go large this year and make a five gallon batch, so we can enjoy the taste of summer for a lot longer. It does mean a lot more cleaning and sanitising work when it comes to bottling it but it is worth it once you have a good stash of rosé in your cellar.

The recipe below is for one UK gallon (160 fl.oz).

Strawberry Wine

From “The Complete Book of Home Winemaking” by H.E.Bravery

3lb strawberries

2lb sugar

5 fl.oz freshly made strong tea

1 Campden tablet

Wine yeast and yeast nutrient

Approximately 1 gallon of water

Boil the sugar in 3 pints of water for 2 minutes, and leave to cool.

Hull the strawberries and put them in a large food safe plastic bucket. You can get large plastic food containers from restaurant supply stores or plastic fermenting buckets from home wine making shops.

Crush the berries well by hand. I find a potato masher usually does the trick.

Add the tea and mix in half a gallon of water and one Campden tablet, crushed and mixed with two tablespoons of water. The addition of tea might sound slightly odd but it adds tannin into the equation, achieving a much better final result.

Add the cooled sugar / water mixture.

Add the wine yeast and nutrient, cover and leave to ferment for 7 days, stirring daily. You can get wine yeast and yeast nutrient at any good home winemaking supply store. They can advise you on the best choice of yeast for the wine style you are making and the quantity of yeast and nutrient to add to your wine, depending on the quantity you are making.

Strawberry Wine 2016 Vintage from britinthesouth.comAfter this, strain the wine. Cover it again and leave to stand for one hour. At this stage boil some water and allow to cool in case you need to top off the wine in the next stage.

Pour carefully into a gallon jar leaving behind as much deposit as you can. Fill up the jar with cooled boiling water to where the neck begins, fit a fermentation lock and leave it until all fermentation has stopped.

At this stage you can bottle the wine, siphoning it into sterilised bottles before corking them.

Strawberry Wine 2016 Vintage from britinthesouth.comThis wine is best drunk young. It will happily last for a year or two stored in the right conditions but it isn’t one to stash away in the cellar and pull out in ten years time.

Strawberry Wine 2016 Vintage from britinthesouth.com


<a href=”http://www.bloglovin.com/blog/14100123/?claim=vg53jwuqtmr”>Follow my blog with Bloglovin</a>

Save

Save